tomogui project
This is the main tomogui application. This application permits user to define a new ‘project’. A project is basically the edition of the reconstruction to run and produce a configuration file that can be run.
tomogui project [configurationFile]
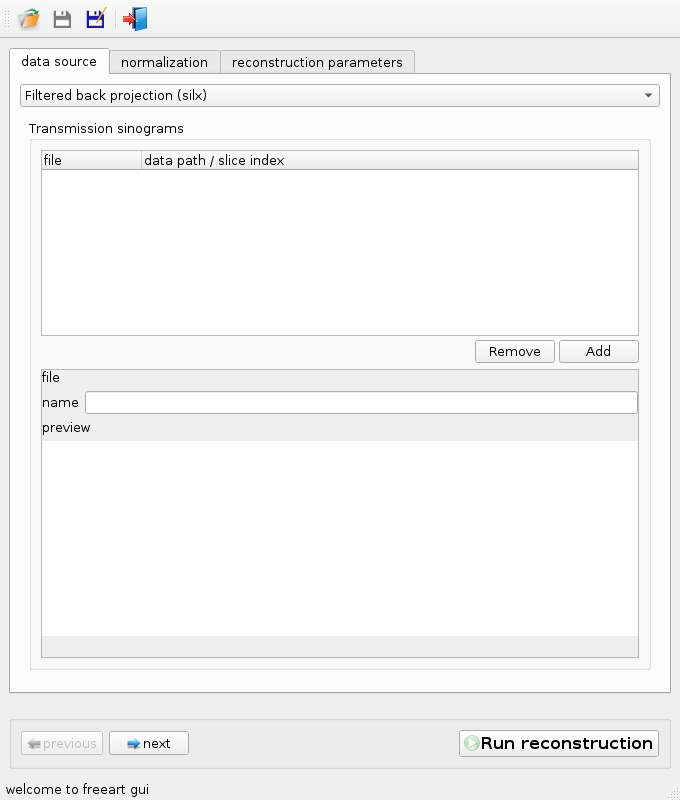
data source tab
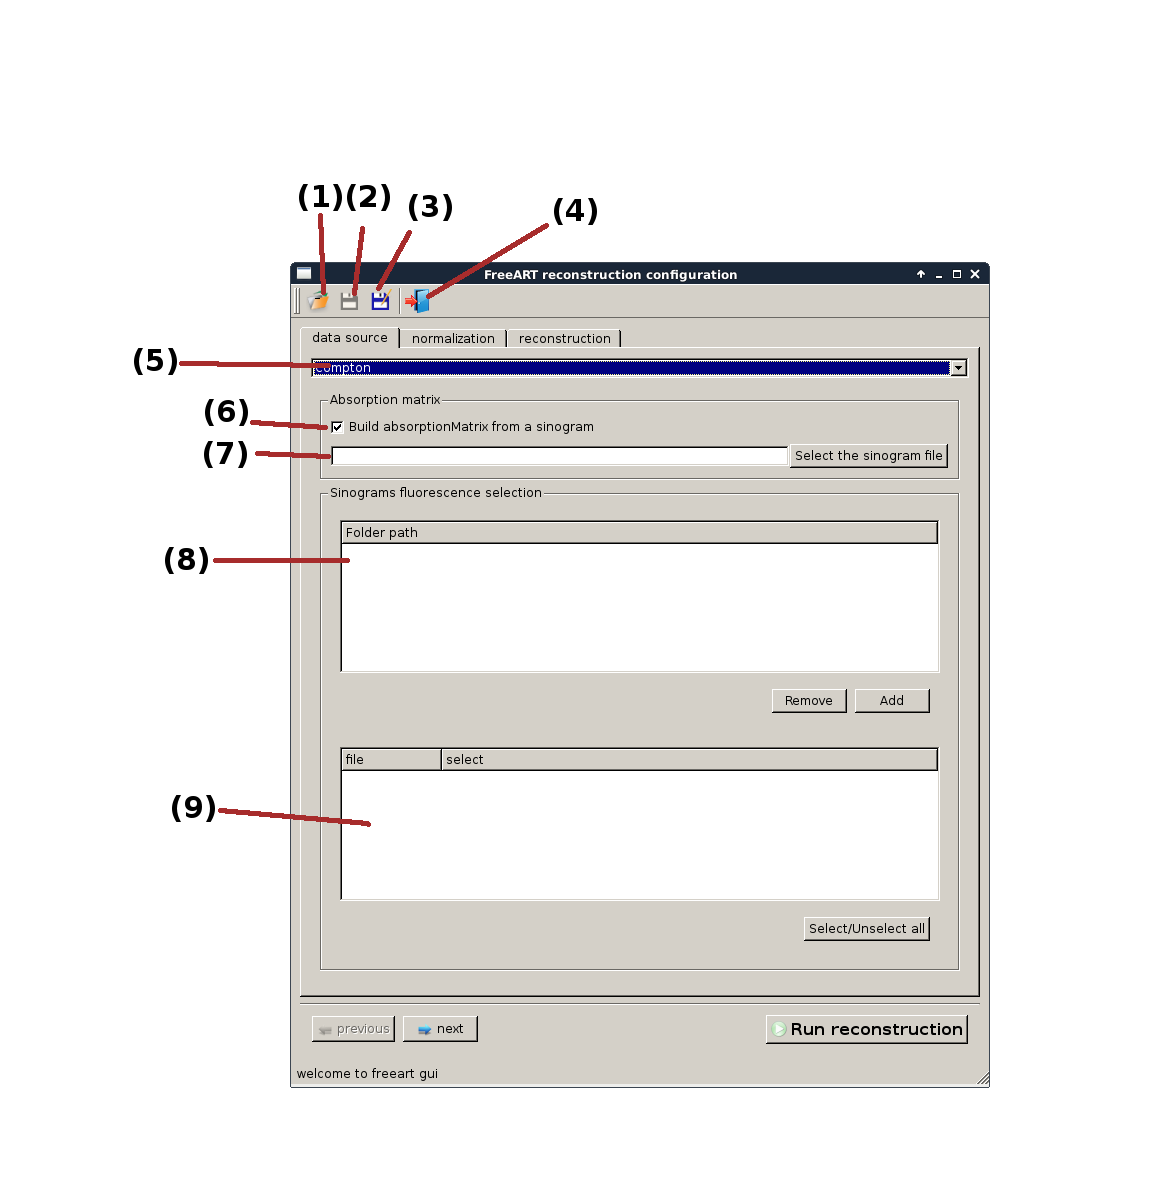
- open project : load a cfg file previously created. This will automatically update the interface from the data contained in the file.
Warning
The file contains absolute path so is higly linked to the computer file system.
- save project : save the project on the current project file.
- save as project : save the project to a new .cfg file
- quit : quit the application
- Reconstruction mode : select the type of reconstruction you want to compute. For now available reconstruction type are :
Transmission
Compton : This is a Fluorescence reconstruction where E0 == EF (so the absorption matrix and the self attenuation matrix are the same)
- Fluorescence
Note
For the fluorescence reconstruction we have to build the self attenuation matrix. In order to do so we have to evaluate \({\mu}_{E_0}\) and \({\mu}_{E_0}\). To do so freeart is using fisx and need to get E0 and EF (to be setted int the reconstruction tab).
Note
The layout will automatically adapt the reconstruction type requested
- BuildAbsorptionMatrix from a sinogram (only for fluorescence / compton reconstruction) : freeart ned to get the absorption matrix. To do so you can ever give him directly the absorption matrix (desactive this option) or build the absorption matrix from It and I0 (active option and give It in (7) and I0 in the normalization tab )
- Select the sinogram file or select absorption matrix (only for fluorescence / compton reconstruction): set the sinogram file if (6)
- List of file added by the user.
- File explorer (for now edf)> Display all sinogram we can reconstruct. Also filter some data generated by pyMca (error data for example).
Normalization tab
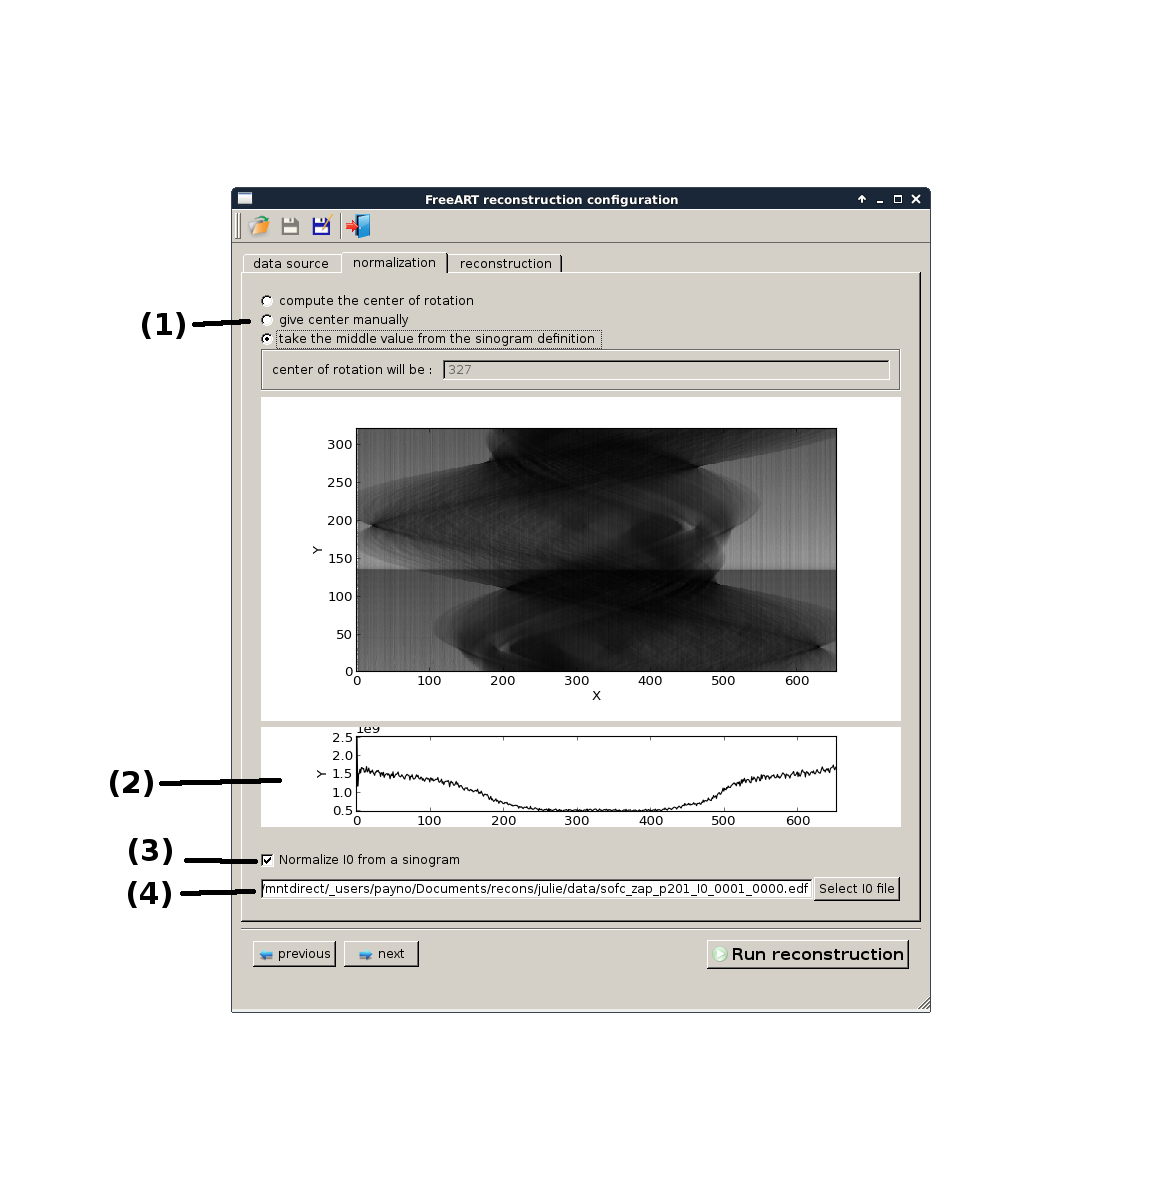
- Select the center of rotation of the sinogram. Will bring to the sinogram ‘redefinition’ centere on the given rotation index.
- Sum of the sinogram value for all the projections
- Normalize I0 from a sinogram :
- if selected then enter a path to I0 sinogram and freeart will used it to normalize data (and generate the matrix of absorption if needed).
- if not setted enter the numeric value to be used during the normalization.
- The numerical value of I0 of the path to the I0 file (depending on the previous 3 option).
Reconstruction parameters tab
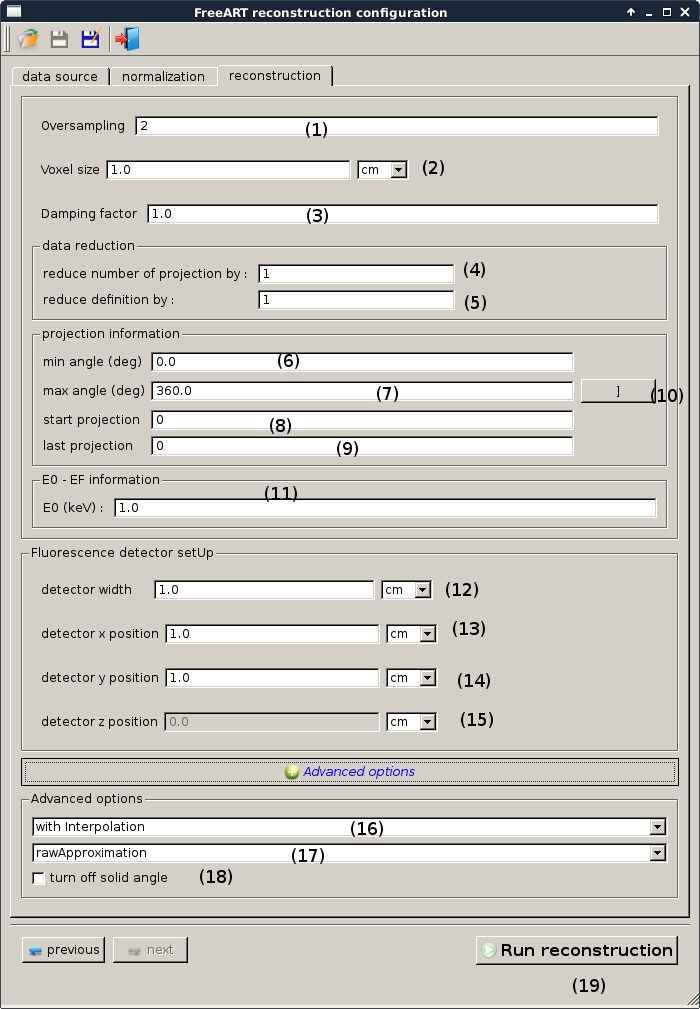
- Oversampling value. When simulating rays we are sampling point on this ray each \(\frac{voxelSize}{oversampling}\) . So the higher the oversampling value is the larger sample point number we will pick (and the reconstruction precision will increase)
- Voxel size : What is the dimension of the voxel (voxel width ) in the “real world”
- Damping factor :also know as the relaxation factor. This is relative to the ART algorithm. After each bacward projection we are updating the value of voxels contributing to this projection. The lower the value is the lower we will converge. But if we have a large number of projection the first projection will have more “influence” in the system.
- reduce number of projection by : will take only one angle projection each n angle…
- reduce definition by : will take only one projection each n projection (for all angle picked)…
- min Angle : the angle corresponding to the first projection we will take (start projection). Unit : In degree in the GUI, cinverted in radians for freeart
- max Angle : the maximal angle fir which we want to make the reconstruction (end projection). This angle can be included or not (see 10)
- start projection : the index of the first projection to take into account (start at 0). The reconstruction will take the projection between start and end projection indexes.
- last projection : the index of the last projection to take into account (start at 0). The reconstruction will take the projection between start and end projection indexes.
- include last angle : the computation of the amgles of projection is a linear interpolation between two values. The top boundary can be included in this angle or not. Formula is close to:
angles = np.linspace(minAngle, maxAngle, nbAngles if includeLastAngle is True else nbAngles+1 ) if includeLastAngle is False :
angles = angles[:-1]
- E0 the value of E0 in keV
- detector width : the width of the area of detection of the detector (to compute the solid angle)
(13, 14, 15) : position of the detector in the freeart reference :
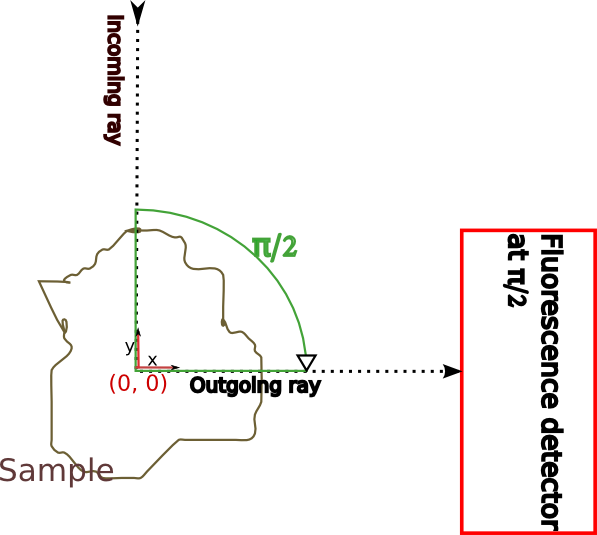
- Fluorescence detector setup : define the detector position and width (specially to compute the solid angle )
- advanced options : beam point value calculation method. We actually have two ways to evaluate the value the point sample in the rays :
- with interpolation we will interpolate the value of the beam from the 4 neighboring voxels values and the distance to their center
- without interpolation we will take the value of the voxel the beam is in and only this value (reduce memory cost by four)
- advanced options : outgoing ray algorithm (for compton and fluorescence only). We have three algorithm to compute the outgoing ray :
- rawApproximation : in this case we are making the evaluation of the outgoing ray the faster as possible by computing for each rotation the mean value of some outgoing rays and taking it as the value of the voxel
- createOneRayPerSamplePoint : in this version we are creating the real outgoing ray for each sample point on the incoming ray and computing the ‘real’ outgoing absorption of the ray by sampling voxels
- matriceSubdivision : this is the raw approximation case but by subdividing the voxels for the outgoing rays we are reducing the noise of the “raw” approximation.
- Turn off solid angle : if true then the solid angle will always be forecd to 1.0, otherwise compute the real solid andle from the beam position and the detector position.
- is last angle == first angle ? : if the last projection is from the same angle as the first projection check the box.
- run reconstruction : launch the reconstruction interface from the given project configuration